Sign up below to receive weekly tips & tools for homeschool science and we'll send you a FREE copy of
Dry ice is one of those materials that can induce hours of science fun for your students. It appears to boil in room temperature water, sending out billows of white, wispy smoke. In today’s Science Corner, I’m sharing a few activities that you can use to explore the science surrounding this amazing material.

Photo Credit: Shawn Henning, used with permission under the Creative Commons Attribution
The Science of Dry Ice
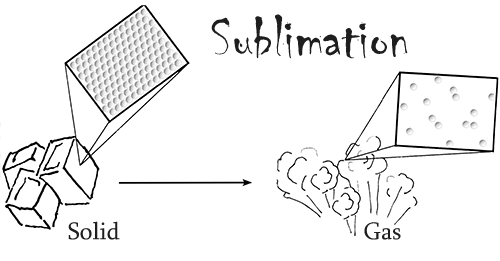
Dry ice is frozen carbon dioxide, the same chemical that can be found in our atmosphere. It is able to keep things very cold because its temperature is around -109.3°F (-78.5°C). What makes dry ice unique is that fact that it readily sublimes at standard atmospheric pressure and temperature. In other words, in our normal conditions this material changes from a solid directly into a gas, skipping the liquid phase.
Dry ice also has three times the cooling power per volume of regular ice. Due to these two facts, this chemical is often used in transporting materials that need to stay refrigerated over a long period of time.
Three Activities
You can use these three activities to give your students an opportunity to see the properties of dry ice in action.
- Dry Ice in Water — Fill a clear plastic cup halfway with water. Place a chunk of dry ice in the cup and observe what happens. (Expected Results: The students should see bubbles immediately form in the liquid. As the bubbles rise to the top, they release a milky white gas, which is composed of water vapor and carbon dioxide.)
- Dry Ice with Soap — Fill a clear plastic cup halfway with water and add 2 TBSP of dish soap. Mix well before adding a chunk of dry ice in the cup and observe what happens. (Expected Results: The students should see bubbles immediately form in the liquid. Although this time, there will be far more than in the first activity. In fact, they will most likely grow out and over the container because the soap has trapped the gases, preventing them from immediately escaping. As the bubbles pop, they release the same milky white gas as seen before.)
- Disappearing Ice — Select two small, but equal pieces of dry ice and regular ice. Place each piece on a separate plate and set the plates aside. After 45 to 60 minutes check the two plates and observe what has happened. (Expected Results: The students should see that the two ice cubes have disappeared, but the regular ice cube left behind a puddle of water, whereas the plate with the dry ice cube is empty. This is because frozen water melts into a liquid at room temperature, while frozen carbon dioxide sublimes into a gas. This is why we call frozen carbon dioxide, “dry ice”.)
Here’s a free printable you can use with the students as they complete these activities. It includes an introduction, directions for the activities without the expected results and space for their observations and conclusions.
- FREE Printable: Dry Ice Exploration
More Activities
Check out the following website for more ideas on how to play with your dry ice!
- http://inashoe.com/2008/11/fun-with-dry-ice/