 Spring is a exceptional time to take a closer look at the structure of a flower.
Many of the typical spring blooms, such as lilies, tulips and daffodils, have clearly seen elements, which makes them excellent specimens for your students to study the structure of a flower.
One of the best was to do this is through a flower dissection, but how does one perform such a dissection?
Step by Step Guide to Flower Dissection
Step 1: Choose your Flower
The first step of a flower dissection is to go out and find a blossom to cut up.
You can purchase a lily or tulip from your local florist, or you can cut a spring bloom from your yard. Either way, make sure that you choose a flower with clearly defined parts

Step 2: Observe the Flower
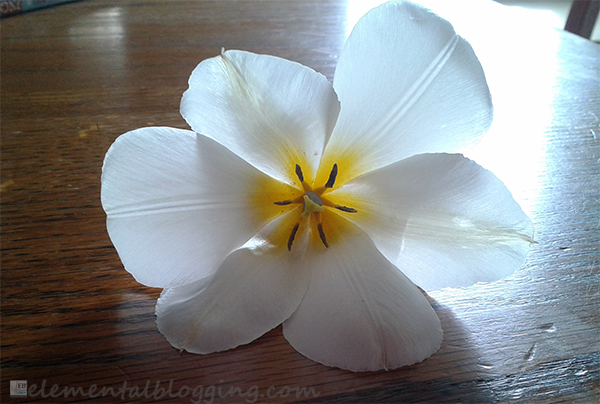
Once you have your flower chosen, have the student observe the parts of the flower.
At the bare minimum, point out the petals, pistil and stamen. Allow the student to use a magnifying glass to observe the parts of the flower even closer. You can read from one of the following encyclopedias to enhance your observations:
- “Flowers” Plant Parts pg. 14-15
- “Flowers & Seeds” Encyclopedia of Nature pg. 128-129
- “Flowering Plants” Usborne Science Encyclopedia pg. 270-273
- “Flowering Plants” Kingfisher Science Encyclopedia pg. 59-61
Step 3: Dissect the Male Parts
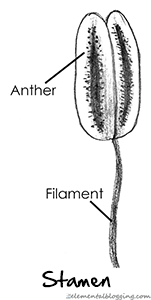
Now that the student has identified the most basic parts of the flower, use a razor to remove the stamen. Then, observe the filament and anther with a magnifying glass. Gently wipe some of the pollen onto a slide with a q-tip and examine it under a microscope. Finally, cut the stamen and anther in half and use a magnifying glass to take a closer look.
You may want to also look at these parts under a microscope to see if you can observe the cells that make up the male parts of the flower.
 Step 4: Dissect the Female Parts
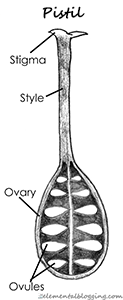
For the last step of your flower dissection, begin by removing the pistil from the flower. Observe the ovary, stigma and style of your flower with a magnifying glass. Cut the structure in half and use a magnifying glass to take a closer look. If your flower is large enough, you may be able to observe the ovules.
You may want to also look at these parts under a microscope to see if you can observe the cells that make up the female parts of the flower.
The Final Product
After you have finished dissecting your flower you can also spend some time examining the stem and leaves with a magnifying glass and under a microscope.

 Sign up below to receive weekly tips & tools for homeschool science and we'll send you a FREE copy of
Hey Paige, this is just what we needed. We are doing this TODAY! Thanks!
So glad to hear that you can use the flower dissection guide! If you have any questions along the way, don’t hesitate to send me an email.